Viewing entries in
Cracking and Winnowing

Ask the Alchemist #326

3 Comments

Ask the Alchemist #326

First time maker. We had some issues for sure but the one thing you for sure take for granted is how to work somewhat cleanly, and how to handle liquid chocolate well. We made a serious mess and it was quite a process to get the melanger clean again. So turn that big brain on and dump all your knowledge about working with chocolate and cleaning.  Please be gentle with me.

3 Comments

Ask the Alchemist #237

1 Comment

Ask the Alchemist #237

Level: Novice

Reading Time: 12 minutes

I just read Dandelion’s new book and chocolate making seems very expensive.  Isn’t there some other way make chocolate without a melanger.  Wouldn’t a high powered vitamix work?  How about the Champion juicer?  Can’t I just run the sugar through there?  It all seems so complicated.  There should be a simpler way.  I can roast coffee in a $10 popcorn air popper.  Can I crack the beans In a corona mill and won’t that make chocolate?

Some of you long time readers might be a little confused with why I would answer these series of question when it seems really old news.  The alternative was “What happens if you dip a cat in chocolate?” and well……

I have seen a large resurgence in these kinds of questions in the last couple months.  New chocolate makers are coming in droves (of which I am thrilled by) and with it people seem to be trying to reinvent the proverbial wheel. 

I in no way want to stifle questions, inquisitiveness and innovation but I also really want people to do a little research and maybe realize that nearly all of these questions have been asked before and answered (mostly with a 'no').

I want people to make chocolate.    Keep that in mind.  So ask yourself this.  If there was a cheaper, simpler way to make chocolate, don’t you think I would be the first to announce it to the world?   Really, I’m not ‘Da Man’ trying to keep secrets hidden.  I've built Chocolate Alchemy on the philosophy that there are no secrets and I want to spread all I know.

I guess this is going to turn into a little review of bean to bar history interspersed with some of the questions.  Let’s take it from the top down, going through each step of the process.

 “You are selling beans from 2015.  Aren’t they too old by now?”

I only sell beans that I’ve personally tested and verified.  I make chocolate regularly and pull beans from our stocks once their flavor profile degrades.  In some cases that is 1 year but many (most really) times it can be 2-3 years. 

“Isn’t Criollo the best?”

They are just the rarest and generally the most mild.  I hold by the stance there is no 'best', just your own personal favorite.

“Can I use an air popper like coffee to roast nibs?”

See the above discussion.  I tried it and for a multitude of reasons it didn’t work.  Mostly it has to do with scale and control.

“Won’t a coffee roaster burn my cocoa?”

No, you can turn it down.  

“Will my chocolate taste like coffee if I use my coffee roaster?”

No, I have done it for years.  Any coffee oils that might cross contaminate the cocoa would be absorbed by the husk which you winnow away.  I’ve never even see that happen and I’ve used the same roaster for years.

“Can I use a home brewing mill to crack my cocoa?”

No, the gap (even adjustable ones) is too small.

“Have you heard of the Crankandstein cocoa mill?  Why don’t you offer it?”

You could say I’ve heard of it.  I invented it and had it built by Crankandstein.  I no longer offer it as I find the Champion juicer does a better job for a similar price.  Plus the Champion is multi-purpose.  You can also make liquor with it.

DSC00005.jpg

“Doesn’t the Champion get to hot and destroy all the flavor of the chocolate?  It seems like it would burn it”.

I discovered using the Champion Juicer for chocolate way back in 2004 and built Chocolate Alchemy and got this whole bean to bar movement going with it.  If it had burned the chocolate or made it inferior I simply can’t imagine we would be where we are today.    Yes, the chocolate gets warm, and even hot, but stays WAY cooler than when you roast.    No, it does not harm the chocolate.

“Can I use the Champion 4000?”

I’ve not personally used one, but hear it works ok, but not as good as the 2000 I offer.  And while I am talking about the Champion, there is a Commercial version but I have not found any difference in performance or longevity compared to the Household model, so I offer the less expensive household model.

“Do I have to use a melanger?  It is so expensive.  Can I use……”

I cut that off because of all the variations.  You can insert Vitamix, blender, grain mill, and any other of standard household appliance and I will answer that I tried out every one of them over the years and would have told you if they worked.  As it is, I specifically outline a bunch HERE that do not work.  Again, I WANT  you to make chocolate.  If I could lower the financial bar, what possible reason would I have for not doing that?  The answer is none.

I’m going to take this opportunity and say I appreciate that this is not an inexpensive hobby.  But when I started down this chocolate making at home road in 2004, before there was a bean to bar movement, it was not even possible to make chocolate at home.  Aside from no knowledge base, all the equipment was industrial.  There were no melangers.  The cheapest winnower was $2000 and did a huge 2 oz a minute.  There were no roasters.  A basic set up would have cost you $100,000 or more.  Now a good setup is $1000.  That is two orders of magnitude.  Please keep that in mind is all I’m saying.

“I’ve read that melangers make inferior chocolate and that you need a mill and conche to make good chocolate.”

The WHOLE bean to bar movement was built on the stunning results of stone melangers.  I think that evidence right there speaks for itself as an answer to that question.

“Why don’t you invent a small $100 melanger?  I’m sure you would get a lot more people into chocolate making.”

I bet Apple would sell a lot more Iphone X if they were $50 too.  I would have done it if I thought it was possible but there is a lower limit to material and building costs.   And really it comes down to scale in this case.  Although there are 1000s of melangers out there, I would bet there are millions of iphone Xs already out there.  If I made 100,000 small melangers I could probably do it for under $100 each but there is that small issue of the $10,000,000 needed to do that.  As big as the bean to bar movement gets, I don’t see it ever being worthwhile to make 100,000 melangers at one go. 

“I’ve heard you can’t use a tempering machine with bean to bar chocolate, that it is too thick.  How do you temper?”

I am baffled where that opinion came from.  You can.  Certain extra light roasts that retain moisture might be a bit thicker, and some makers don’t like using cocoa butter (which makes for a more fluid chocolate), which I don’t understand, but you absolutely can use a tempering machine.  That said, they are expensive and I don’t see a reason not to hand temper or to use Silk which is nearly fool proof.

That is a selection of questions that have come in the last couple months.   I said at the beginning I wanted to give you a basic history of bean to bar.  Dandelion’s book showed the successes very well, but what they didn’t describe (nor was it their place to) was the multitude of failures I went through.  It would be impossible for me to tell you everything I tried but know that if it was a common household item, I tried it and if you don’t see it as an option, it is because it failed.  And when I say failed I mean were too expensive, too DIY, too cumbersome, too hard to work with or literally just failed.  

What are some of those things that didn’t work ?

  • Ice cream maker (conche)
  • Rock tumbler (refiner/conche)
  • Air popper (roasting)
  • Ball bearings in mixer (ball mill refiner – expensive)
  • Rolling pin (cracker)
  • Mortar and pestle (well, becaue)
  • Hand peeling (too hard)
  • Corona type mill (poor results)
  • Champion Juicer (refining sugar – fail)
  • Champion Juicer (winnowing  - hard on machine and tasted bad)
  • Vita-Mix (burned the chocolate)
  • Other Juicers (ride up and fail)
  • Home convection ovens (under powered)
  • Meat Grinders (crackers and refiner)
  • Food processors (refiner)
  • Grain mills (cracker and refiner)
  • Coffee grinders (refiner)
  • Indian Wet Grinder (burned out, but we modified them to the Melanger you now know)

And that is just a sampling.  Various other Rube Goldberg type contraptions were tried and there were many variations of those above.  All that and more brought us to this place at this time where the web is full of free information on how you can get into chocolate making for the barest fraction of what it would have cost 20 years ago. 

By all means keep trying though….but maybe not the same things others have tried and proved doesn’t work. There is that semi-urban myth that the definition of crazy is doing the same thing over and over expecting a different result.  Try not to be crazy.

 Just like they say there are no new ideas for story lines anymore, I am pretty confident there are no longer any obvious solutions for making chocolate simpler and significantly less expensive than there currently is.

Regardless, keep experimenting, making and asking questions.

Cheers.

1 Comment

4 Comments

Ask the Alchemist #160

Level: Apprentice

Read time: 4 minutes

After winnowing I was told to remove all excess of twigs from the nibs (which is the root of each bean- see picture attached) otherwise my chocolate would be bitter! The task is huge!!! We can only remove 2 pounds per hour per person so for me it is rather an additional stress.

I have been grinding 3 different batches. The first 25lbs batch I left it for 24hrs. It was good but a bit over roasted, the second was much better and I left it for 36 yours. I tried a batch with the “twigs” to taste the difference and this batch grinded for 36 hrs too. I agree that it tasted bitter in the grinder but not so bad once tempered….Please give me your thoughts on these twigs.


germ-nibs

My opinion is that it is utter nonsense.  And I’ll say it again, it is my opinion.

Now let’s talk about it.

Those twigs are called the germ of the cocoa bean.  The theory goes, as you described, is that they are horridly bitter and must be removed to make quality chocolate.  I’ve heard this over and over, and have yet to see any solid proof of it.  Just opinion.  Which is all I am giving you.

But try this.  Get a roasted cocoa bean.  Look to the large end.  You will see a small circle like indentation.  With your fingers or tweezers pull out the germ.  Or just crack the bean and pull it out.  Taste it.   Chew it up really well.

Is it bitter?  To my tastes it is not.  It’s a bit harder than a nib (but it will still refine down), but mostly I find it woody and neutral tasting.  And even if it were, how could something that amounts to less than 1% of the weight of the chocolate ruin it?  I have real trouble believing that.

So maybe it reacts with something in the chocolate and makes it bitter?  Great theory, but having done tasting after tasting, I have yet to find that substantiated.   I cannot taste any difference and I’ve never met a person that can tell me from a blind tasting whether a chocolate has had the germ removed.  I’ve only seen the reviews where a bar is raved over and it is disclosed that the maker has gone to the extra trouble to remove the germ.

Correlation is not causation for one.  And two, that sound suspiciously like cherry picking data or knowledge based bias.  You know it does or does not contain germ and skew your expectations and what you think you taste accordingly.

And also the assertion does not take into account the huge number of award winning chocolates out there that have germ.  It seems conveniently ignore that.

My suggestion is to do the test again.  Make sure you use the exact same roast batch and that you blind taste the results.  And in a perfect test, have more than just two samples.  Make up 4 of each and taste them all.  Blind.

I’d put money on you not being able to tell them apart reliably.

If it turns out you can, then ok.  I’m a supporter of data and YOUR tastes.  If you like it better without germ, then by all means remove it.  But do it because it REALLY makes a difference AND you like the difference more.

My suggestion as always is to make the chocolate you like.  And not do extra work that is not needed.

In my case that means I ignore the germ.  And think you should too.

Those are my thoughts.

4 Comments

Comment

Ask the Alchemist #127

I’m having trouble with my winnower. It’s been working great for months and now it just won’t pull the husk out. I’ve tried all the different settings and it just work.

I received this via email and wasn’t really an Ask the Alchemist, but I’m turning it into one as I think it’s good information.

This is classic trouble shooting to my mind. A little background.

Both the Sylph and Aether use a valve in the vacuum path to regulate the amount of suction and amount of flow but simply controlling how big of a ‘leak’ there is in the vacuum chamber. Much simpler and less expensive than flow controllers and variable speed blowers. As you winnower, very fine particulates can find their way to the filter inside the vacuum. Dust basically. The vortex arrangement of the air flow keeps it pretty well dust free, but some does make it up and out of the waste bin if it gets too full. Instead of having to clean the filter continuously you can just close the ‘leak’ a little and restore the original flow.

This is a known ‘issue’ and why I designed it this way. And I made sure to call out in the manual to keep the filter clean after every full container of husk.

No matter how far closed the vacuum valve was there was significant husk in the nibs. In this case though the valve was all the way closed and the filter was clean. This then falls into troubleshooting. And there are really only three options.

1) The fan in the vacuum broke.

2) There was a leak somewhere else

3) There was a blockage somewhere preventing flow.

A quick check of the fan itself showed no issue. You can hear when vacuum fans go bad. It’s VERY obvious. Loud usually. Or grinding.

I had them check over all the various openings and connections feeling for air flow where it shouldn’t be. Nothing.

As the Sherlock adage goes, ‘when you have eliminated the impossible, whatever remains, however improbable, must be the truth’.

It’s not the fan. It’s not another leak. It’s not the filter. It MUST be another blockage.

Check the hose? Clear. Exit ports on the vacuum. Clear.

Your deduction Watson?. Is there another filter? YES!

It turns out that in many vacuums there are TWO filters. And many manuals don’t mention the 2nd one as it hardly ever gets clogged. The obvious place for it was between the filter and the exit…and there is was.

And it was CAKED. Once that was cleaned off and shaken out, the winnower worked like new.

vacuum.jpg What you should take away from this is that just because YOU didn’t change something in your system, doesn’t mean that something has not changed. Yeah, it’s kind of obvious, but half the troubleshooting I do (gladly) ever week is like this. The key Is finding that one thing that has changed.

So, keep those secondary filters clean on your winnower. And the next time something goes wrong, try listing out as many variables as you can and checking them against the last time things were working well. Good luck all.

Send in your Ask the Alchemist questions to questions@chocolatealchemy.com

Comment

Comment

Ask the Alchemist #124

What do the symbols mean on you winnower logos? Where did you find them? Is Aether with a long A or E or something else?

I have been waiting for this question for years. Thank you. First off, the logo.

aether.jpg To begin, I didn’t find the central figure. It is a composite of traditional alchemical symbols. Chocolate ALCHEMY after all. But some of the individual symbols and the logo I did design.

The top figure (the H like figure) is the alchemical symbol for Pulverize. It is as close to “Crack” (as in cracking the cocoa bean) as I could get.

Proceeding sinister (counter clockwise around the circle -since we are breaking something down) we encounter one the four Elements, Air. The means by which the process in question is acted upon.

And completing the circle we have the symbol for Separation.

Pulverize, Air, Separate. In other words, cracking and winnowing.

After that it was just a matter of arranging the symbols into a new composite Symbol. Cracking and Winnowing.

In regards to the Sylph, you will see one more symbol in there. Mu. In the world of chemistry and measurements, it stands for “micro”, as in micrometer. Small. And so the Sylph is the ‘smaller’ winnower. Maybe one day there will be a nano or pico winnower.

Finally, the “A” is silent. It is Ether with a long E. No long A.

And why the name? Two reasons. The triangle in the symbol that makes up Air is also the symbol for the Ether – the mystical fifth Element that permeates the universe (we are talking symbolism here, I don’t believe this). Aether is an alternative spelling that lends an old world feel in my opinion. Seems a good way to start the mystical transformation of cocoa to chocolate!

Send in your Ask the Alchemist questions to questions@chocolatealchemy.com

Comment

2 Comments

Ask the Alchemist #113

I do not do the “Champion juicer” step - I take the roasted nibs (purchased from the Alchemist himself) and slowly add them directly to the santha. I’m sure there’s more husk included than some purists would like. This got me thinking…Since the santha pulverizes everything, what is the effect of skipping the cracking / winnowing step all together and refining the whole bean (husk and all)?

The simple part first. I have had this same thought myself, so I tried it a couple different times. The results were less than stellar. Although the Melanger was more than capable of making the chocolate smooth, there were odd, and not very pleasant defect flavors present. For lack of better terms, the chocolate tasted dusty, musty and bitterishly astringent. And given the science background I have, that was of course in direct comparison to chocolate that had been fully winnowed of husk. A control in effect.

So overall, it is not a good idea to make chocolate from the whole unwinnowed bean.

You also mentioned that you made chocolate from nibs that had more husk than some purists would like. And that you received those nibs from me. That brings up a good point. In this same set of tests (years ago now) I set up a set of chocolates with varying amounts of husk remaining (based on initial weight of whole beans). 0, 1%, 2%, 5%, 10%, 15% and ~20% (unwinnowed). This was specifically to test at what the threshold point was for tasting the husk contribution.

What I found was that I was completely unable to discern the first three chocolate apart. Which frankly surprised me. I was pretty sure 5% would easily be discernible. But it was much more subtle than I expected. It left me mostly with a 'meh' impression. Not a great chocolate, but not bad either. Just not something I had a desire to keep eating. Upwards to 10% it was clear something was not right, and by 15% it was clear there was way to much husk. It basically tasted like the unwinnowed chocolate. But back to the lower levels. Try as I might I could not tell the 0, 1% and 2% chocolates apart. Which is the point of experimenting.

I've watched and listened to chocolate makers obsess about getting every little piece of husk out. It often goes hand in hand with those who sort their beans from a visual standpoint (which as a reminder, I don't find a need for) and use it as a platform to boost about the care they use in making the best chocolate. And in theory, I am all for removing as much husk as you reasonably can. It's just your basic responsibility of making chocolate. But I find it a bit disingenuous to brag about something that should be a given. More to the point, I find it kind of silly to pick through your nibs to remove every single piece of husk when it simply won't make a difference in the resulting chocolate. It is almost kind of superstitious and ritualistic. And mostly a time wasting event. Given my actual tasting results. Please keep that in mind.

To me, it's like any other project that has hidden pieces. A wall. The interior studs. You don't use 2x4's that have been planed, sanded to a smooth finish and oiled to a high gloss only to cover them with dry wall. It is just wasting time and money. It adds nothing at all to the value, quality or longevity of the wall. You would laugh (or at least walk away) from a contractor that bid your house out if he told you his houses were better if he painstakingly sanded and finished every single interior stud, wouldn't you? It is the same thing.

Don't waste time and effort where it isn't warranted. That is all I am saying. And please, don't take my word for it. Try it yourself. Winnow your beans. Not necessarily half hearted, but don't be obsessive. Then split the batch, and REALLY winnow the other half. Make two batches of chocolate and taste them blind. If you have done a reasonable job with that first winnowing, I'd put money down you can't tell them apart. And if you can? Great! You have learned something and now you know what level of husk is acceptable. But you then making an informed decision. You aren't just following a blind ritual.

One other point. The amount of husk can be deceiving. I've yet to find a person who has not actually weighted out husk who can accurately determine by looking how much husk is remaining in a batch of nibs. It's often over estimated by 10 fold I have found. Husk is just so much less dense than nibs, and your eye (partly because you are looking for it) estimates high. It was mentioned that sometimes there is husk in the nibs that I produce. Yep. I own that. But it is well under 1%, and often well under 0.5%. A totally acceptable amount (based own my own tests and tastes of many others) to have in your chocolate. And one other item to consider. Being less dense, husk has a tendency to rise to the surface of a pile of nibs, so what you see isn't homogenous. It's weighted toward showing a weighted distribution of husk. i.e. it looks like more than there is because you assume it's homogenous when it isn't.

Finally, just a few photos to demonstrate what I am talking about.

25-combined.jpg 5-combined.jpg 2-combined.jpg

1-combined.jpg 1-vs-nibs1.jpg Rather deceiving, isn't it?

It'a all about balance folks. There is nothing wrong with being thorough, and wanting to make the best chocolate you can. Just be smart and put the work in where it matters and not where it doesn't. There's no need for finish carpentry work on the inside of a wall.

Happy chocolate making!

2 Comments

Comment

Ask the Alchemist #80

I´m trying to replicate your Aether winnower, by the way, thanks for putting together such a nice piece of work! I wonder what are the sizes of the two acrylic boxes that hold the husks.

Thanks.

To be ornery, I don’t use acrylic boxes. They are polycarbonate. Next question….Oh wait…you didn’t even ask a question….Still, next question….

Fine, I’m not that ornery.

Well, as odd as it seems, that is a slightly difficult answer to answer. Ok, it is not so difficult as it is slightly complicated. I want to say outright that there is NOTHING magical or unique about the two chamber sizes. You can build one half or a quarter or twice or three times as large and it will operate just fine…..but you might find it less than convenient, which is why I have them sized as I do. So, first the answers.

The vacuum chamber (outer box) has inside dimensions of 14.75”x17.5”x14.75”. It has outside dimensions 1” larger per side as that is the thickness of the frame, so 16.75”x19.5”x16.75”. The key here, i.e. the important part, is how they fit together. The outside dimensions of the husk bin (inner box) is 13.75” on all sides. Basically an exact fit given I need 1/4” room for rivets on each side and a little (1/4” again) real world tolerance/slop. The inner dimensions really don’t matter.

Now, the first iteration of the Aether was about 30%. Why? Well, in an effort not to reinvent the wheel, I’ll just quote myself.

“The vacuum and husk bin are a little smaller. Why? Because we heard back that people tended to wait until the husk bin was completely full and at that point it was too heavy for some. It's about 20% narrower.

Not including the hopper (which rises about 36" above the table top) the Aether is 36" x 24" x 24".

Also, nearly all the dimensions have been reduced slightly to optimize the number of panels we can get out of a single piece of sheet metal. Why? So raw material waste goes down, and consequently your cost goes down. “

That basically says it. Size it for you and what you can handle. I’m not a small guy. I toss 150 lb sacks of cocoa beans around. I don’t blink at unloaded a ton (literally) of 55 lb boxes of cocoa butter by hand. I lift a few times a week and have pulled 355 lbs off the floor multiple time. A full husk bin that weighted 60 lbs didn’t phase me and I honestly forgot that is too much for some people. So now it holds around 40 lbs (really, if you do the numbers, it’s 42, which is THE answer now, isn’t it) which I’ve heard no complaints about. Also, if you fill the hopper 3 times, and have a reasonable efficiency (78-80%) then it just fills the husk bin nice and those kind of whole number design integrations just tend to make me happy.

So, I guess the dimensions were not that hard to answer. But hopefully I’ve explained the thinking behind why they are the size they are and that will let you customize it to your abilities and needs.

Comment

3 Comments

Ask the Alchemist #78

How long can raw beans keep prior to roasting? After roasting ? Is the bean roasted, at its most vulnerable stage? How stable is chocolate tempered and non tempered? After removing finished chocolate from the melanger , can or should chocolate be tempered first or can it be put in ziplock bags straight from melanger ?

I for one was blown away by my first hand made chocolate. To this day I think it was due to the freshness. It had a vitality and liveliness to it that I just had never tasted in any other chocolate. But there are so many stages. And clearly some are more important than others. What I had was still months old, so absolute age is not always an indicator of ‘freshness’. Let’s break it down and have a brief look at each potential stage and where you should be careful, and where it isn’t quite as important.

When it comes down to it, staleness (the opposite of freshness) is caused by the beans, nibs or chocolate reacting wit air, or more specifically oxygen. As a good rule of thumb, the cooler you have the beans/nibs/chocolate, the slower the reaction. But I can hear you now “but we roast! That’s really hot”…yep, and I will get to that. Not all heat is bad. It’s a matter of application, length of time and form. Hang tight.

Raw beans are by far the most stable. They are sealed up in the shell/husk/covering. They are basically sealed away from oxygen. Like this, kept cool (let’s just call cool, anything you can comfortably live in), most beans will easily keep 1 year. Most will keep two years. And some will keep 3 years. How do you know? Really, you don’t, but between throwing out 3 year old beans and taking a chance and making chocolate, I’m going to make chocolate. What is there to lose?

Next, a quick side note on temperatures. There is a running joke about this. What do you get if you put your cocoa in the freezer? Cold beans. Ok, it’s not really funny, but the point is is that once you are below a certain temperature, the oxidation reactions are so slow, that they are basically stopped. My experience is around 50 F for cocoa. Below that, are you are doing is making cold beans. Think of it like falling. Once you are within 12 inches of the ground, it really doesn’t matter if you are closer. You simply are not going to be ‘hurt less’ by falling 6 or 3 or 1 inch. You’ve passed the level of ‘hurt’ at 12 inches. Below that you are just closer to the ground. And a quicker side note to the side note. It is even possible that if you freeze your beans, you may even damage them via ice crystals in the cells and such. I don’t know, but think of freezing fresh fruit. It’s great refergerated, but not good frozen and thawed. Such, it’s still ‘not bad’ but that does NOT mean it is good. It’s just not spoiled. Moving on. Next, let’s move to nibs.

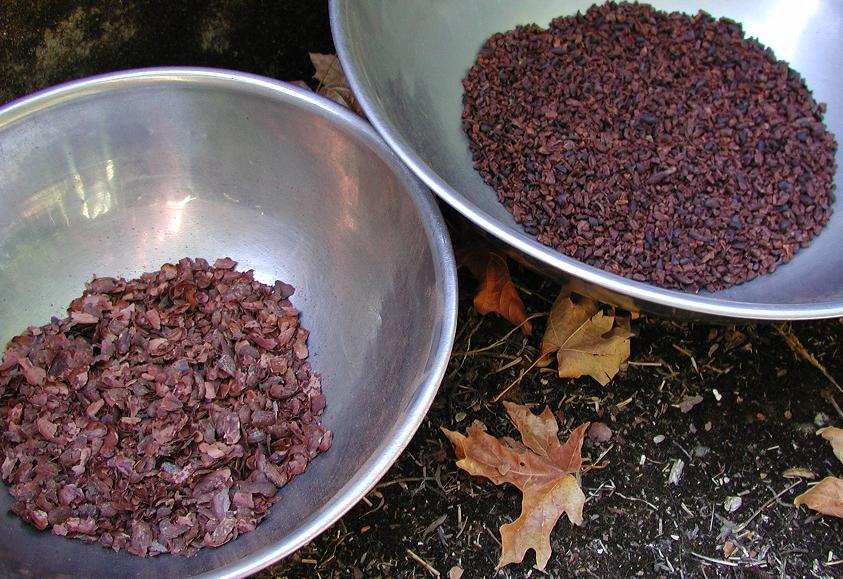
At this point, you have exposed the interior to oxygen. Also, they could either have been roasted or raw.

In the case of raw nibs, I find that over the span of about a week, they will lighten in color around the edges. I don’t know for sure what this is, but it seems to be a good enough indication something is going on….but it also stops. So, basically, you have about a week for raw nibs, but the good news is that it’s just a little staling, and not ‘they are only good for a week’. But then they are stable as raw beans. 1-3 years. But since there is more surface area per volume, let’s just be safe and call it 1-2 years.

In the case of roasted beans and nibs, we have introduced heat. Quite a bit of it. But lucky for use, this level of heat does not promote instantaneous staling. It’s way beyond that level and other chemical reactions are happening. But what it does do is give us a new host of chemicals that are in higher energy states that are just ready and waiting for ‘cooler’ chemical reactions, i.e. staling. Analogy time. You have a slab of meat. Or vegetable. Or toast. Toast is a really good one. Toast is a great one. Bread it good (i.e. not stale) for about a week. Fresh toast is not stale right out of the toaster. It’s got this great….toasty goodness going on. And it’s still ‘good’ toast for a couple hours even if it’s cold. But let it sit out all day and by bed time….and it’s gone stale….but then it just kind stops. It continues to dry out, but doesn’t really get any worse. Basically like roasted beans….except I’d give roasted beans a couple weeks. But if we break up the toast into bit, we get croutons. The stale quicker. Why? More surface area. Same with nibs. I’d give roasted nibs about a week.

Now before you all go off panicking that you have been using bad, stale, roasted nibs, keep in mind a few things. First, I was talking about leaving your bread/toast/beans/nibs out in the air. What happens if you seal up your croutons? They keep longer. Much longer. You have excluded oxygen and so you have limited the chemical reactions. And lucky for you and me, I keep everything sealed here, and ship in ziplock bags….for a reason. In a good sealed bag, I’d give roasted beans 1-2 months, and roasted nibs just a little less. 4-6 weeks off the top of my head. But if you were to store roasted beans at 95-100 F instead of 70 F (I’ve done this, so it’s not empirical but experimental) they go stale much faster. As in maybe a week for roasted beans and a few days for nibs.

Are you noticing a pattern here? The less surface area, and the less heat input, the longer they will keep. It’s really that simple. To explicitly answer your question, yes, your roasted nibs are the most ‘vulnerable’…but still not all that vulnerable.

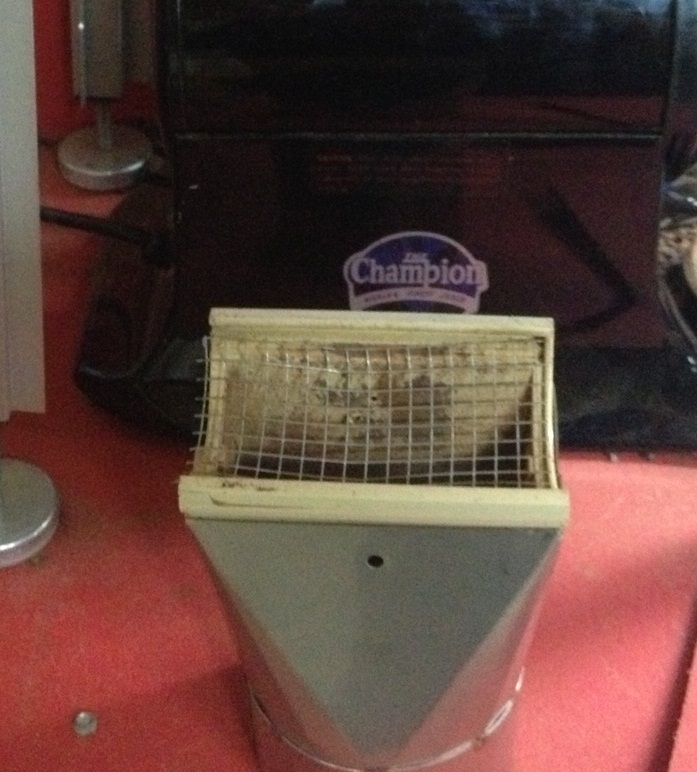
But this is a good place to re-iterate something I’ve said before. Let your roasted beans fully and completely cool before cracking and winnowing. This is why. If you have freshly roasted beans, even if they are cool to the touch after one hour, they are still teaming with chemical reactions and the best way to introduce staling reactions is to break them open into nibs and give them a bunch more surface area. Relax. Let them rest a good 6 hours to tie off those reactions and ‘calm down’.

So, to review. Assuming ‘cool and dry’ and seal in an air tight bag.

  • Whole raw cocoa beans – 1-3 years
  • Raw cocoa nibs 1-2 years with very minor staling
  • Whole roasted cocoa beans - 1-2 months with a little more staling
  • Roasted cocoa nibs 4-6 weeks with just a touch more staling.

Ok, that’s enough for this one. There were a lot of questions in that one questions, so consider this Part 1 of 2. I’ll talk about chocolate next week. Same choc time, same choc station.

3 Comments

10 Comments

Ask the Alchemist #68

Thanks to you, I am now winnowing my own beans. I LOVE the Slyph. Thank you!! To crack and feed the beans, I am using the champion juicer like you use for the Aether. I’m not complaining, but I’ve noticed that my nibs, although basically free of husk, don’t quite look as nice as the ones I used to get from you. Do you know what I might be doing wrong? Is it the deluxe cracker you use?

Very observant grasshopper.

And thanks for the perfect introduction to something I’ve wanted to talk about. Yes, a few of you notice that the nibs I send have changed recently. They are a bit smaller. And just a touch cleaner, especially the raw nibs. The answer is that I use a slightly different system than I’ve told anyone about…up until now. But first a little back story.

I’ve mentioned before that raw beans don’t winnow quite as well as roasted beans. It’s partly because the husk is heavier and partly because the nib and husk don’t separate as well when cracked. The laborious solution I’ve used is a screen when I deem that there is too much husk coming through. Basic 1/8” hardware cloth. And what was left on the screen was put back through the Champion and winnower until most passed through the screen.

screen.jpg
While working on a different project, I tried fitting different sized screens to the bottom of the Champion juicer. What I was working on failed (but I learned a lot) but the result was inspiration that if added the 1/8” screen (I’d been working with much smaller screen) maybe it would recycle the larger nibs until they passed through the screen….and that is exactly what they did.

champion-screen.jpg

The result, to my mind, is a much cleaner, more even nib.

screened-nibs.jpg
So, feel free to give it a try. I’ve been experimenting and here are a few observations.

It does slow the feed rate up a little; More so with raw beans.

Roasted beans work fine with the screen on and you barely notice the reduction in speed, and in the scheme of things, if you are only doing 2 lbs, what’s 2 minutes vs 2.5 minutes?

I like the performance better with raw beans if I put them through once (not worrying too much about efficiency). Then add the screen and put them through again. The second time through really flies and to my mind makes up for the extra pass since it gives such a nicer product.

Some beans that are a little less than perfect in preparation, namely Dominican Republic, really need two passes. Once without the screen, once with it. Otherwise the system just kind of bogs down and one slow pass ends up taking longer than two quick passes.

Finally, and with a rather awkward transition, people have also been asking when (and if) I will be bringing the Cocoa mill back. For those that had not heard, Crankandstein is moving to a new shop and decide with 2 days notice to stop making these ‘until the end of summer’. And it has given me time to consider the Mill. And honestly I’m leaning in toward the frame of mind that the manual cocoa mill’s time has run it’s course. At first I had made some conclusions that the Cocoa mill was better than the Champion. But as time went on, and both my winnowing technique got better and two winnowers because available, I’ve reversed my conclusion. Hands down, the Champion performs faster, with less trouble and more efficiency than the Mill. The only item really in favor of the mill is that in some places (such as some cocoa origins) where power is scarce, the mill is the only option. Ok, two items. The cutter wheel on the Champion wears out over time. But for the occasional home chocolate maker, this can be years. And for the professional, there is the Deluxe cracker (with new tool steel blade that have about 1 MT of cocoa beans of life to them).

So I guess I want input from you my customers and readers. Has the Cocoa mill become obsolete? Or are some of you looking to get one once they become available?

—– Submit your Questions to the Alchemist: question(youknowtoremovethisright?)@chocolatealchemy.com —–

10 Comments

Comment

Ask the Alchemist #11

What are the different ways that people winnow their cocoa beans? What are the pros and cons between them?

Well, first and foremost, we should just get it out of the way, and define winnowing.

From Webster’s Definition of WINNOW - transitive verb 1 a (1) : to remove (as chaff) by a current of air. The reason I put that in there is I’ve received the tech support questions that the Cocoa mill and/or Champion is not winnowing properly. Can you see where this is going? These two devices don’t winnow. They crack the beans, which granted is first step before winnowing, but they don’t have a ‘current of air’ and are not meant to winnow.

With that out of the way, I would suggest going over to my Alchemy Notebook and reading about Winnowing there. It really says it all there. (BTW, that is a new page that is not linked in the side bar - once the entire Notebook is updated, I'll get all the links modified) But to give you just a quick run down, you can winnow really only a few different ways, and you guessed it, they all involve a current of air after having cracked the beans.

  • Blow on them.
  • Use a blow drier
  • Use a fan and drop the nib/husk mixture in front of it.

And of course (now, see the post earlier this week)

  • Use a winnower.

Seriously, that is about it. I used a blow drier for MANY years, and it works pretty well – but it makes a mess – everywhere. Blowing on them – well, technically yes, but a fan or blow drier is easier. The fan method seems great in theory, but I found it very fussy to make work if not built into an ‘official’ winnower where the introduction of the nibs and husk were very were controlled.

That leaves a choice of winnowers. There a few models you may have found on the web of long drop tube pvc models with multiple fans or blowers. Or versions of bird seed or grass seed separators. Again, both seem good in theory, but turn out to require more human intervention and baby sitting than just hand (read blow drier) winnowing.

There is also a vortex winnower I’ve seen tossed around – and I’ve played with one, and spoken to a small handful of people who have used them. And unfortunately, they are too expensive ($35,000 last I checked) or simply don’t live up to the claims of separation efficiency.

What that leads me to is a small amount of slightly abashed self promotion in suggesting either the Aether or Sylph winnowers. They are a modified long drop tube pvc winnowers, except they are missing the long drop tube, fussy, dual fan/blower controllers and are pretty inexpensive (comparing of course against $2-5K lab winnowers) . I won’t try and sell you on them – you have the links. I’ll also say they are not that complicated to build yourself if you are moderately handy with tools.

That’s about it.

What about hand peeling the beans you ask? Is there a current of air I say? No? Then it’s peeling, and it IS removing the husk from the bean, but the question was about winnowing. You can do it, but don’t expect more than about 1 lb/hour and do expect sore fingers by the end.

Comment

Comment

The Sylph Winnower for sale

I am pleased to present, the Sylph Winnower: sylphtop.jpg It's been a while coming, but the first (to my knowledge) consumer sized winnower is now available (at least at a not unreasonable price and with a reasonable efficiency and through put).

aether-logo-sylph-iii.jpg What you see there is how it comes.  You need to supply a cracker (Champion or Cocoa mill) and vacuum.  But I know many of you have these already. I hope that brings  a sigh of relief to a number of you who have been winnowing by hand all these years.

Comment

Comment

Website Migration

The site will be migrating today to a new server.  There may (or may not) be some small periods of down time. Also, I've been updating some of the Alchemist Notebook pages - they are not linked in, but you can view them directly here:

Roasting

Cracking and Winnowing (with history of the Aether, plans, and more)

Comment

18 Comments

The Aether "Sprite" Winnower

Sometimes I just can't help myself.  I don't have the full size Aether readily available (although, it's marching quickly closer), but I had to see if I could put together what I've wanted for years - a table top winnower. And I did.  May I present the Aether "Sprite"  -                                    aether-logo-sprite-small.JPG

sylph-small.JPG

sylph-top-small.JPG

All the same basic features of the full size model, just smaller.  The only major difference is there is no cracker or feeder.  But this is intended to couple with the other table top equipment and it's no problem with you cracking in the Champion or Crankandstein and hand feeding.  5-10 lbs is a breeze.  And it works with virtually any size shop vac.  The one attached is a tiny 1 gallon one. More details later, both plans and pricing.

18 Comments

22 Comments

Announcing the Aether Winnower

I would like to officially announce the Aether Winnower.

aether-winnower-small.JPG

aether-logo.JPG

50 lb capacity cracker.  Dual air flow calibration.  Clear sided husk trap.  Stainless steel, aluminum, PVC construction. 1+lb/min winnowing rate.

And you can see the distribution of husk and nib.  I just can't ask for better than that.  80.7 % recovery.

husk-vs-nibs.JPG

I will be contacting those interested in beta units for testing.  More later.  Inquiries welcome.

This is a very old post, but you can still buy the Aether, and they still work great.


22 Comments

1 Comment

Peru - FT/Org now in

A new beautifully prepared Criollo from Peru is in.  It's also available Wholesale, by the bag or even MT if that's your need. As far as the winnower is concerned, some beta units are being built.  Right now aluminum and PVC.  I have some pricing for Stainless steel and the first numbers coming in are looking like that material will easily add $1000-1500 to the price.  Ouch I know.  As for clear plastic, oddly, it may end up being cost prohibitive.  I'm having trouble finding anyone to make low volume prototypes and the tooling for injection molding is putting it above stainless so far.

On the other side, I have put together the parts for an even smaller system.  Basically a bare bones one that is easy to build and has no frills.  I'll keep you posted.

1 Comment

10 Comments

Chocolate Alchemy's DIY Winnower part 3

A picture is worth a 1000 words...and I'm just not up to a thousand words right now. cropped-winnower-sm.JPG

That is the official working model.  40 lb hopper.  Husk bin to contain that and more.  All neat and slip fit with no guess work for assembly.  It breaks down easy for shipping.  It processed 40 lbs of roasted beans into 31 lbs 3 oz of nibs in 31 min 8 seconds. Technical note:  I have a slight riser in the husk waste stream (for overall design reasons, not performance reasons).  It's 18".  I found any more than that and the drag in the tube was too great and the specified vacuum had trouble providing enough suction.

Next it goes into metal, polycarbonate and pvc.  All stainless steel after that.

10 Comments

5 Comments

Chocolate Alchemy's DIY Winnower part 2

It has come to light that a few clarifications are in order. Very first off.  The use of the Champion.  The Champion is being used as a cracker and feeder.  The screen holder needs a little minor modification.  It comes with a grid which needs to be clipped out, and it needs to be attached (left as an exercise to the student) to the rectangular PVC fitting.  You can see what I did - a light piece of sheet metal folded up and screwed on.  That's it.  Can you do it without the Champion?  Er, yes, I guess you can, but you have to crack the nibs still, and then feed them by hand, and your efficiency will drop - why not just use the Champion?  Money?  Fair enough.  Your call then. champion-detail.JPG

And yes, I will be offering that piece for sale once I can catch my breath.

The next clarification is: what in the world that 'disk' is for, is it REALLY needed  (oy, no comment), and exactly where does it go?

From this point on that disk is now a 'Deflector' - 'deflectors up captain' (sorry, couldn't resist, but I guess we ARE talking rocket science here).  Its job is to deflect the husk and nib that are barreling down the feed tube, at a fraction of the speed of light (OK, a VERY VERY small fraction), dissipating their momentum, and allowing them to enter the air streams ('whatever you do, don't cross the streams...' 'ok, we are going to cross the streams...') (let me know if you need the old pop culture reference)...where was I? - oh yeah.  When the nibs and husk enter the air stream at near zero velocity momentum, they enter in a controlled fashion, and can be acted on by the air stream with minimal fuse - the result, if you have not noticed, is no long drop tube.  It's not just short - it's GONE.  The nibs drop about 2", are out of the major flow because they are below that 2" hole, and the husk immediately turn upward and are carried away.  In nearly all the designs I experimented with, the drop tube's only function was to slow down the husk via an upward moving air stream so it could be turned around and carried away.  Here, the deflector does the job.

deflector.JPG

And likewise, I will offer up this piece for sale once I catch my breath.

Next set of questions?

5 Comments

8 Comments

Chocolate Alchemy's DIY Winnower

Okay, for those of you completely chomping at the bit, here is the first draft of an easy to build and operate Do It Yourself (DIY) winnower.  It's made from 2" and 3" PVC fittings and pipe, a Champion Juicer and a common Shop-Vac.  You will need to work out a support structure for it if you want to build one now, but that too will come along at some point in the next month or so.  It will handle both roasted and raw cocoa beans.  Roasted behave much better, but in either case, the better the bean preparation, the better the separation.  It will produce 1 lbs of nibs in just over a minute and will average 77-79% recovery when 'tuned' properly.
I have not yet detailed every last bit of information on how to assemble it, but  I wanted to get it out there.  I will be talking at length as to how and why it works, how the inspiration came (it's from 15 years as a chemist working with quadupole and ion trap mass spectrometers - how's that for a small tease?).There are virtually endless configurations that can work - and of course virtually endless variations that will not work.  If you can build it exactly as is, perfect.  If you feel you must modify something, PLEASE try not to change the pieces in yellow.  Their dimensions, sizes, lengths, configurations, etc WORK.  But as you will notice, there are LOTS of places you can customize for your needs.That's it for now - here it is:winnower-v1-no-notes.JPG
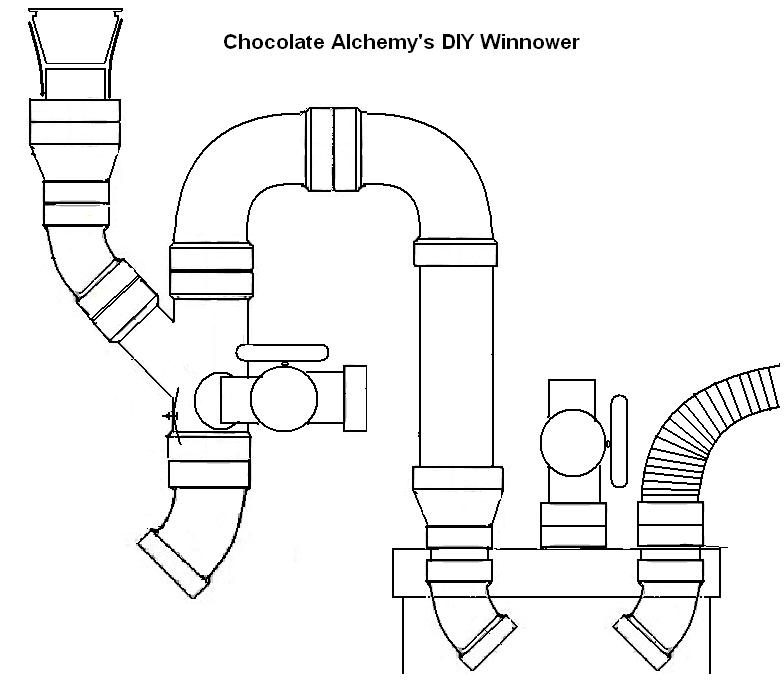
And here are the more detailed plans.

winnower-v1-color.JPG

Feel free of course to e-mail me if you have questions.  If you build it, you will have to 'tune it' by adjusting the two valves to regulate the air flows.  Off hand, as an estimate, the valve on the left can be all the way open for raw nibs, and about 1/3 close for roasted nibs.  The valve on the right is adjusted to regulate the total flow and is closed until husk stops falling out of the nib exit.  Again, I'll detail tuning in greater depth, and email if you want more information now. Finally, and please pardon my soapbox (stepping up as we speak), but PLEASE don't ask me why I didn't design it this way or that way.  I can't answer that negative question. The base answer is I've designed and built something that works with parts that are off the shelf, and/or very simple to make if you have a mind to.  And I don't fix what isn't broken.   Is it perfect?  No.  Is it $35,000? No.  Is it $5,000? No.  Am I a little defensive - yeah, maybe a little.  In almost every case the answer as to why this or that isn't in there is cost and ease of making it.  This is an elegant, simple design that works.  Are there places for improvement?  Yep, and they will most likely add cost because they will be more complex.   (stepping down).  But right now for about $50 in PVC, plus a Champion (which you may well have), and  a Shop-Vac (again that you may have), plus a couple hours time, you can have an automated working winnower. That all said, feel free to ask why I designed it a certain way (do you note that difference?).  I am more than happy to discuss why it is designed as it is and how it works.

8 Comments